Finally, the touchscreen plugin is available!
One of the most awaited plugins for Volumio is finall here: the touchscreen plugin. With it you can easily show the gorgeous Volumio UI on any display, included the official Raspberry PI Display, available on our Shop. Let’s see how to easily achieve a fantastic touchscreen for your favourite music player in less than 10 minutes. This tutorial will explain how to connect the Raspberry PI display and enable the Volumio UI with the plugin.
STEP 1: The wiring
Assuming you’ve already downloaded and flashed Volumio to your Raspberry PI (we suggest to use the newest Raspberry PI 3), the first step is the wiring:
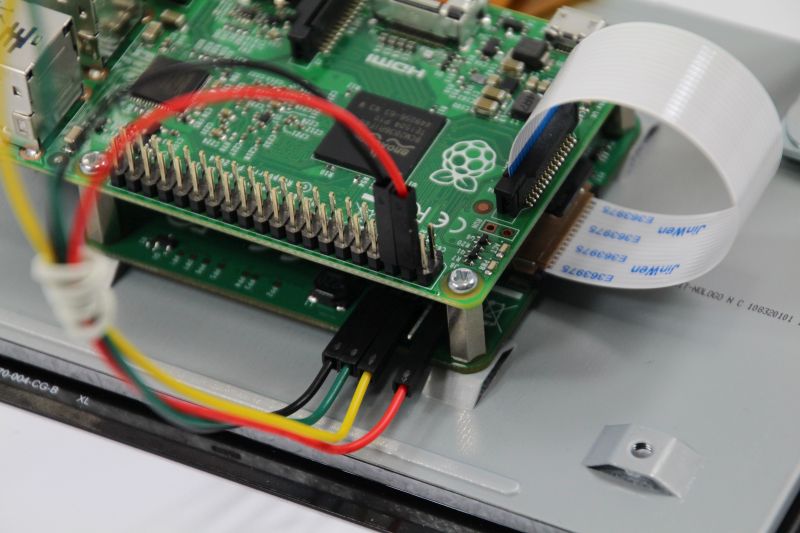
- First, let’s attach the ribbon cable going from the Raspberry PI Display to the PI itself. On the Raspberry PI Side, make sure the blue part of the ribbon cable is facing outwards. Your final goal should look like this:
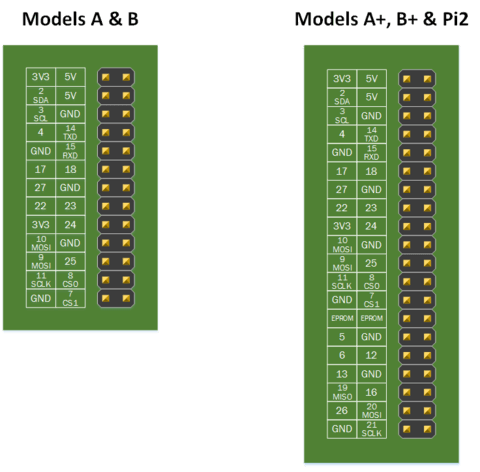
- You’ll have 4 coloured cables to connect too. They are 5v, GND, SDA and SCL. You can look at the below image to identify the proper pin on the Pi itself.
 Therefore, the wiring should look like this
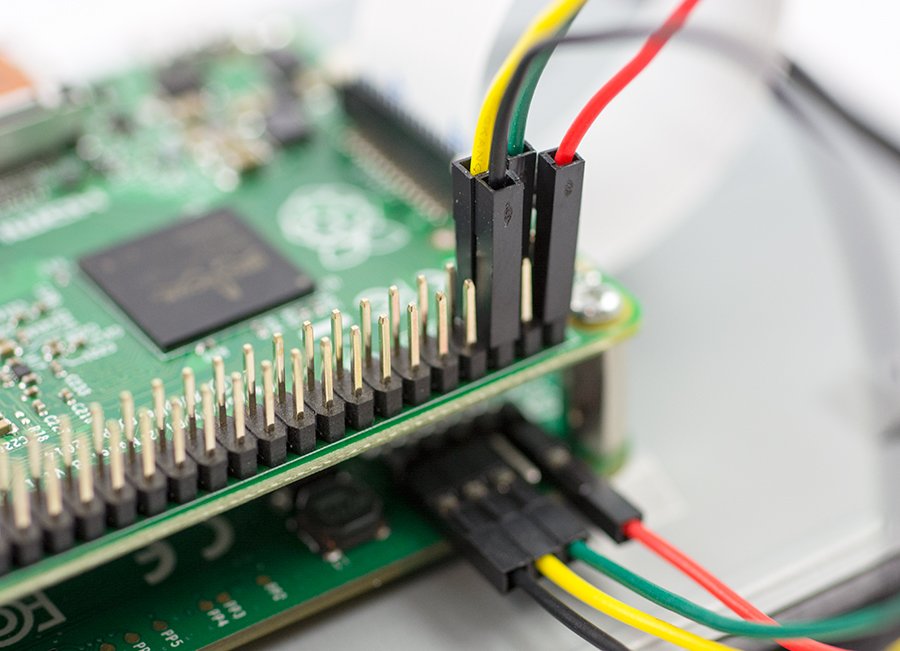
Done! You’ve done the wiring required to connect the Raspberry PI official touchscren, let’s move on!
STEP 2: Power Supply Check
Notoriously, feeding your PI with an adequate Power Supply is mandatory to have a reliable system. That’s especially true when we connect a power-hungry device like the Raspberry PI Display. Luckily, there’s a way to understand if your PSU is good enough: just power on your pi and observe the screen, if you see a coloured square on the top-right side of the screen, it means that power to your PI is not enough. Don’t you see it? Then all is good.
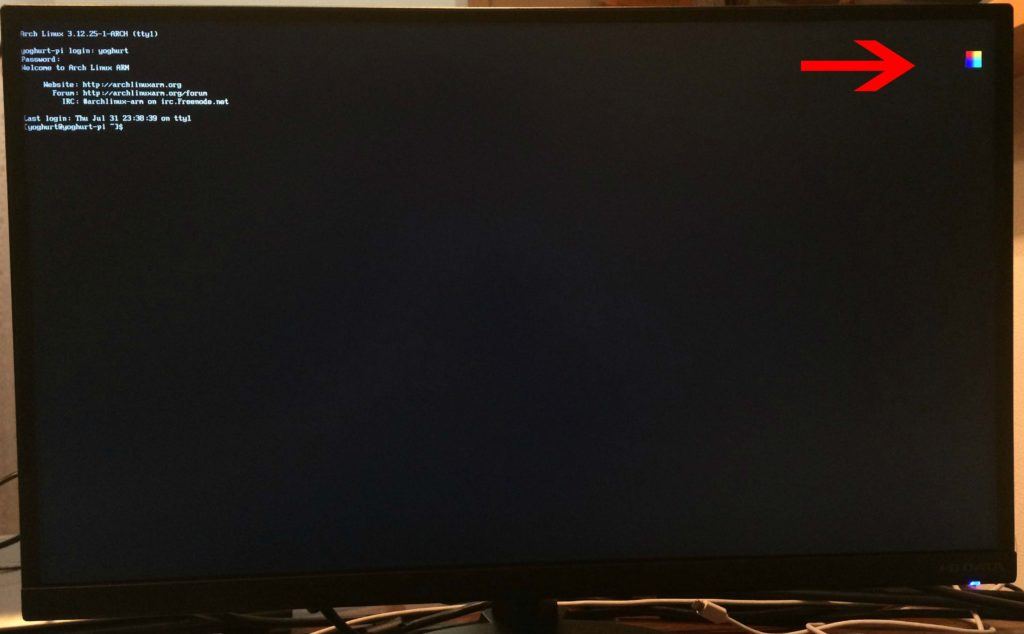
If you have such problems, don’t worry. Good power supply are cheap and easy to find. Here’s the NorthPada 5V 2000mA PSU, my personal favourite.
STEP 3: Install Volumio’s Touchscreen plugin
That’s the easy one. Just connect to Volumio’s WebUi as you would usually do, and navigate to the Plugins page from the settings menu. In Miscellanea category, you’ll find the Touchscreen plugin. Just click install, nothing more. PLEASE NOTE: The touchscreen plugin is compatible with volumio version from 2.001 onwards
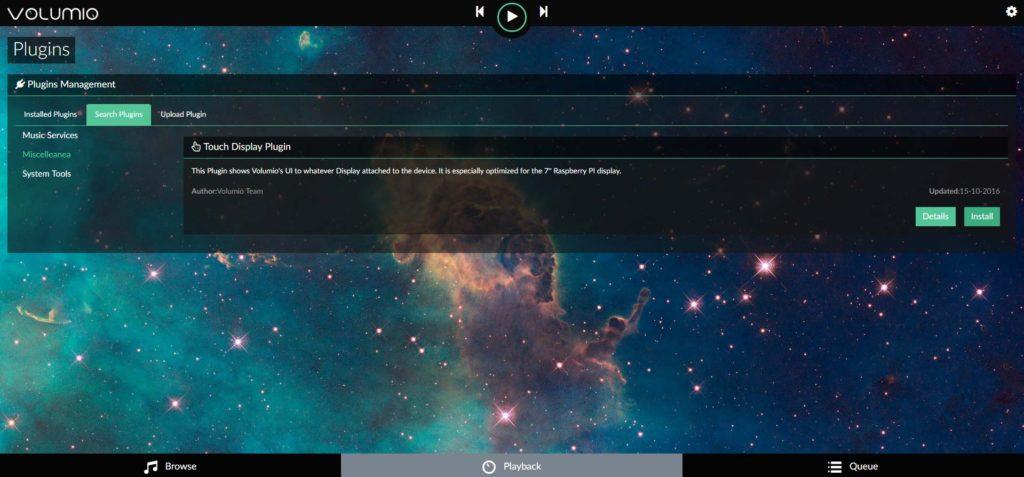
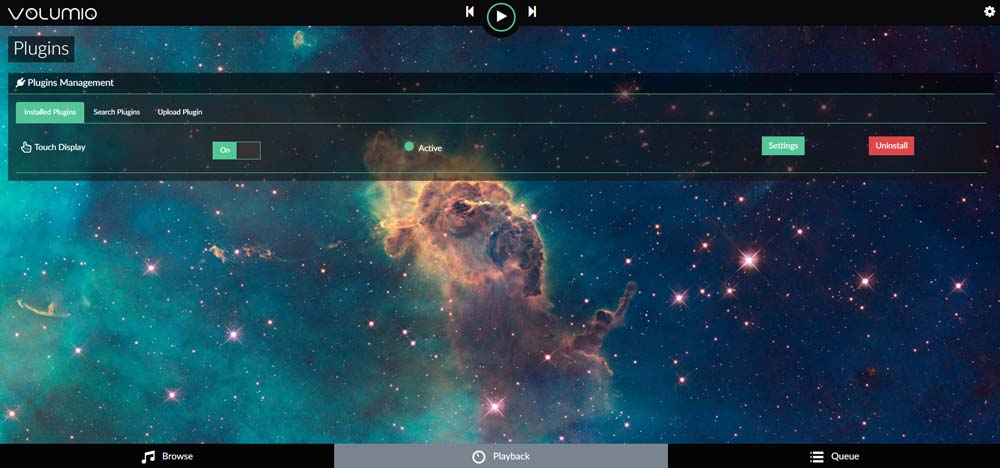
The installation will last about 7 minutes, so wait patiently until you see “Installation Complete”. Now you can enable or disable the Display output to your likings.
STEP 4: Enjoy it!!!
I must admit that altough this display is not particularly brilliant when it comes to resolution and colour accuracy, it looks indeed very nice with Volumio’s UI. Also, usability is very good on the Raspberry PI 3 and the UI runs smoothly also with big libraries… So, folks, enjoy!
Are you looking for alternatives?
If you don’t have a Raspberry PI, or you’re simply looking for alternatives to the Official Raspberry PI Display, there are at least two extra options for you:
THE ODROID DISPLAY
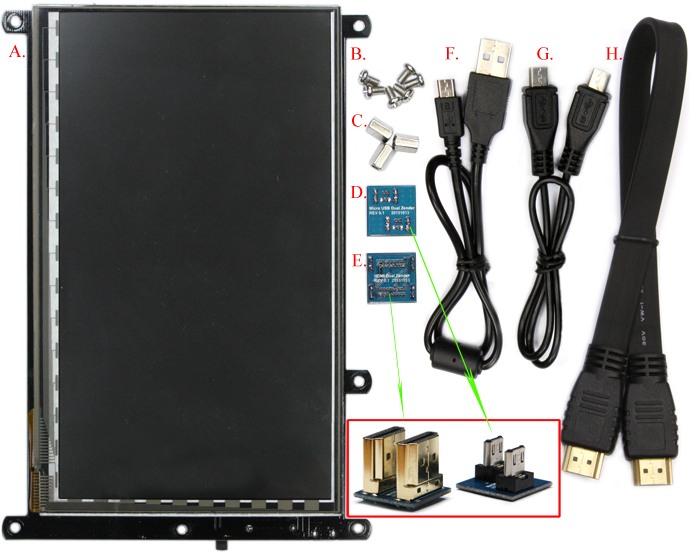
The Odroid display is not only a viable alternative, it also have several advantages over its PI counterpart:
- Since it takes power from USB and video signal from HDMI, it can be used virtually with any Computer with an HDMI output, not just the Odroid or the Raspberry PI.
- It has a better resolution: 1024 x 600 vs 800×480 of the PI display
- It’s somehow simpler to integrate into a beautiful case (thanks to its mounting holes)
- You can still use an I2S DAC with the Display, since it does not use any GPIO port (both on Raspberry PI and Odroid)
The Odroid Touchscreen display is available at Odroid’s webshop or on Amazon
UPDATE: Lot of time since I published the original article. The Odroid 7” does not seem to work properly with Raspberry PI (not tested with the Odroid). So, if you’re looking for a display for the Raspberry PI, get the official one.
WAVESHARE 7” DISPLAY
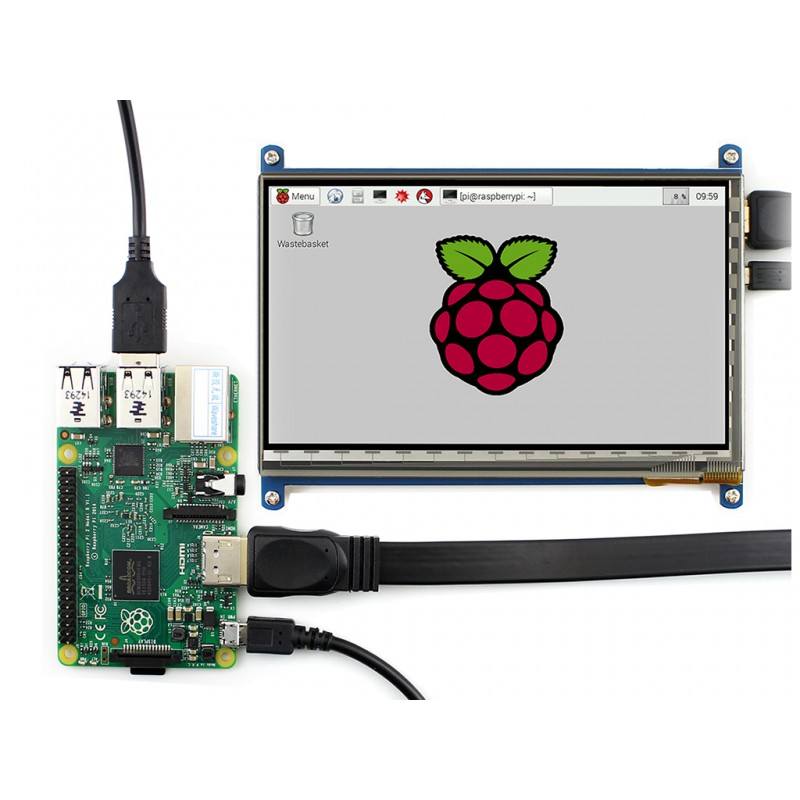
The Waveshare 7” display has become rapidly a widely adopted display, thanks to its cheap price. However this particular touchscreen has shown several reliability issues (altough this seems fixed in latest models, thanks to a firmware update), it requires a particular touchscreen driver which is not always included in major distros and its colour reproduction is not the best.
It can be found at the Waveshare Shop or on Amazon
Here we are folks! Hope you found this article helpful, you can share via comment below how you use your Volumio’s touchscreen setup and if there are other display alternatives!
Get your Official Raspberry PI Display from our store and help the project!
[product sku=”EAR2718″]

